-
7.
uniFi+ Installation guide
The purpose of this document is to guide technicians in setting up and installing uniFi+ customer accounts, including Freemium, Trial and Premium accounts.
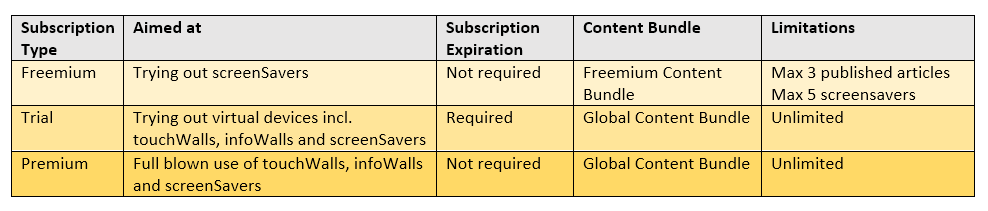
Differences between the 3 types of accounts are Subscription Type, Subscription Expiration and the Content Bundle chosen as the default. See below:

-
7.1
Before starting
Please make sure you have the following available before starting the installation:
- Information from sales on the library including
- The name of the library + country/language
- Identification of the selfchecks (quickConnect ID + location name)
- Email on at least one person from the library that should be granted access to tlAdmin
(from there they can create more users themselves)
- quickConnect must be updated to v1.83.1 or later for uniFi+ screenSaver to work
- Access to uniFi+ Manager (https://transformativelibrary.com/TLManager)
- If you do not have a login to uniFi+ Manager yet, please reach out to Morten Ohlsson on Teams
or mail (m.ohlsson@bibliotheca.com) to request one.
- If you do not have a login to uniFi+ Manager yet, please reach out to Morten Ohlsson on Teams
- Information from sales on the library including
-
7.2
Create a customer account
Creation of an account is done through uniFi+ Manager. Login to uniFi+ Manager and
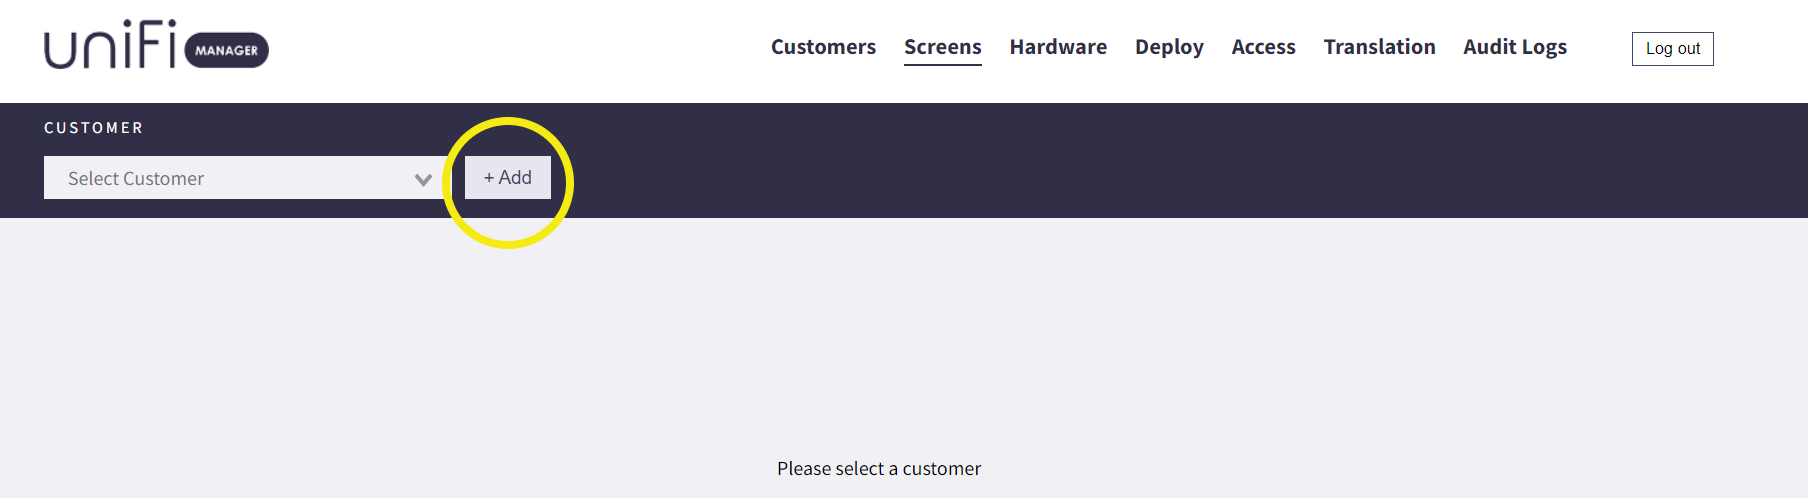
1. Click +Add button to create a new customer.

2. Fill out the form and click the Save button.
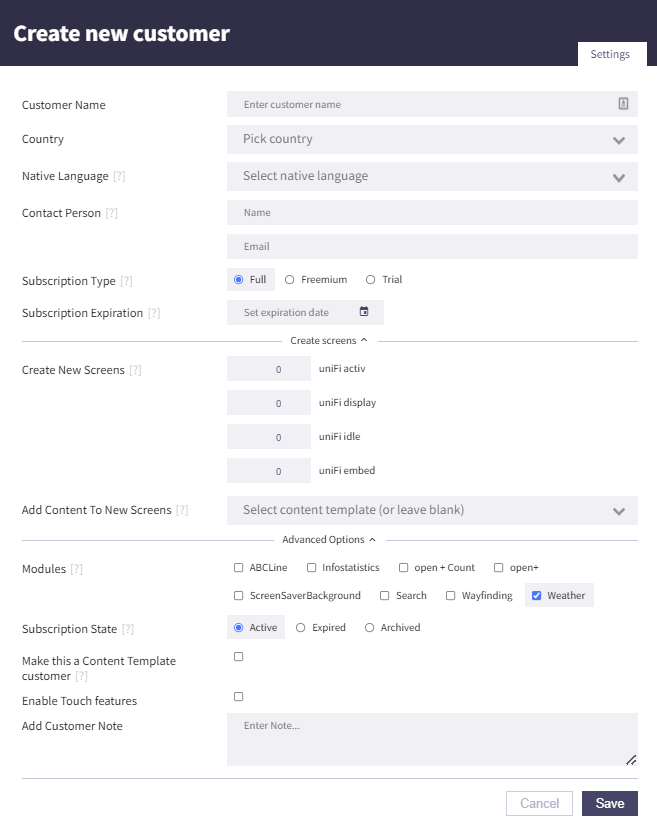
Type in the customer’s name and select the relevant country and languages:
- Native language - should be the most commonly used language by the customer.
- Languages - pick the primary language once more and if needed add additional languages.
- Contact person - insert the name and email of the primary contact person of the library. A user for the customer will be created with these informations. This is optional and users can be created at a later point in time in the User-menu. When editing the customer, a list of existing users on the customer can be selected instead.
- Subscription type – set this to Freemium, Trial or Premium, depending on the customer in question.
- Expiration date – Freemium (not required), Trial (required), Premium (not required).
- Create new screens – Freemium only supports up to 5 screensavers. Trial and Premium support unlimited touchWalls, infoWalls, screenSavers and promotions. Choose the number of screensavers to setup.
- Add content to new screens:
– For Freemium choose “Freemium content bundle” to copy the content to the new account.
– For Trial and Premium choose “Global content bundle” to copy the content to the new account.
Content will automatically be attached to the screens created
- Modules – If the customer has open+ count and/or open+ access, check this module – leave the rest with defaults.
- Subscription state – leave this active.
- Make this a content template customer – leave this unchecked.
- Enable touch features – leave this unchecked.
- Add customer note - additional information about the customer can optionally be written here.
-
7.3
Create a new user
To create a new user for the newly created customer:
1. Click the Users button.
2. Click the +Add new user button.

Since this is the primary user, remember to grant all rights!
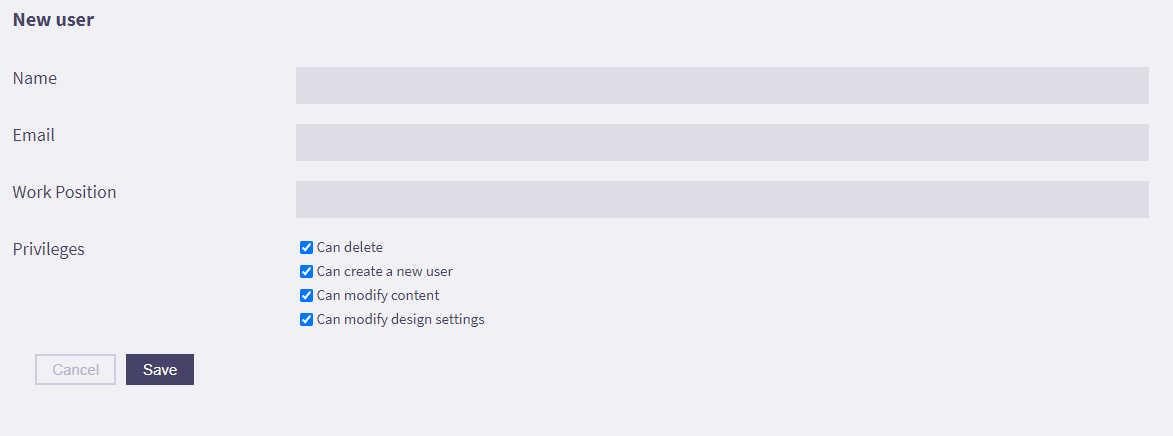
3. Fill in the information, and then click the Save button.
NB! Please note that this action will send an email to the customer with login-information so please have all steps above done before creating the account!
-
7.4
QuickConnect and screenSavers
Now with the customer account created and the screens/content added to the account, it’s time to install
the uniFi+idle on the quickConnect installations.To do this, please follow the updated guide here: http://help.transformativelibrary.com/internal-manual/install-software-on-device/
-
7.5
quickConnect and uniFi+embeds
Starting from quickConnect v2.2.6 it is possible to integrate uniFi+ with quickConnect. To set this up, a promotion first has to be installed on the system.
In the quickConnect System Manager tool, select Appearance -> Promotions. If the uniFi+ client should be in control of all the content, make sure to remove the standard selection. Choose "+ Add Web Promotion" and type in

as the URL.
-
7.6
Test the screenSavers
For each of the screenSavers, please test that the screenSaver is actually being opened and that default
content is presented. -
7.7
Optional: Integration with open+ Count
If the customer has ordered open+ count integration follow these steps:
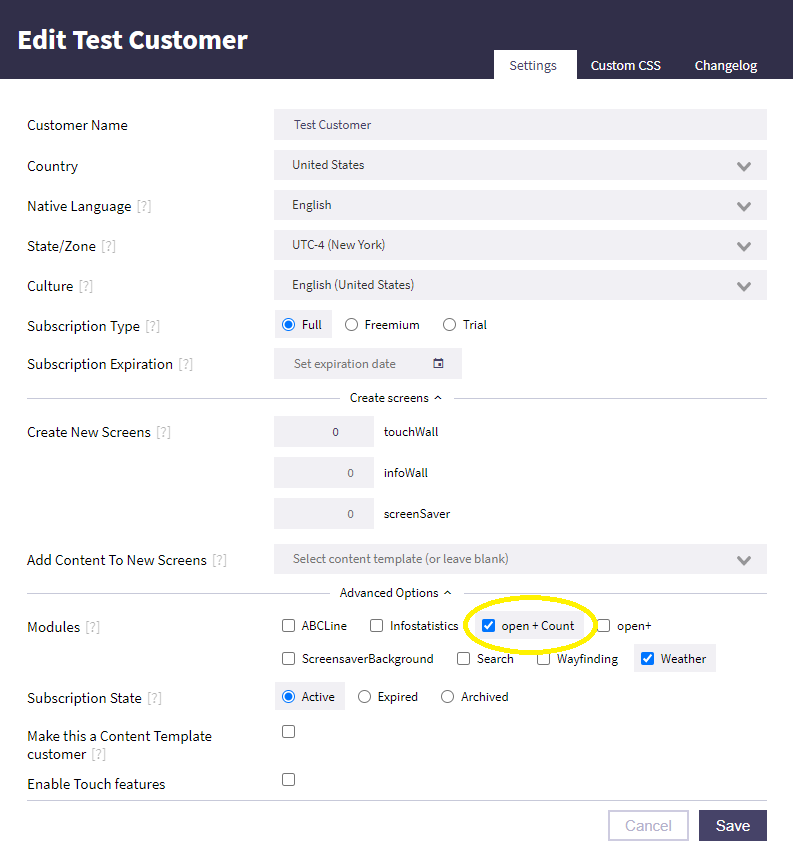
1. Select your customer in the dropdown, and click the Edit button.

2. Under “Modules”, check the box for “open+ Count”, and then click the Save button.
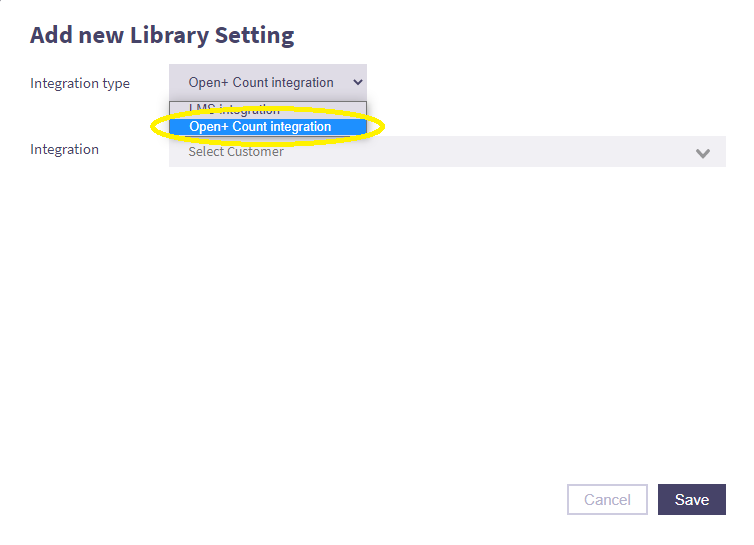
3. Go to the “Integrations” tab and click the + Add new button.

4. From the dropdown select “open+ Count integration”.
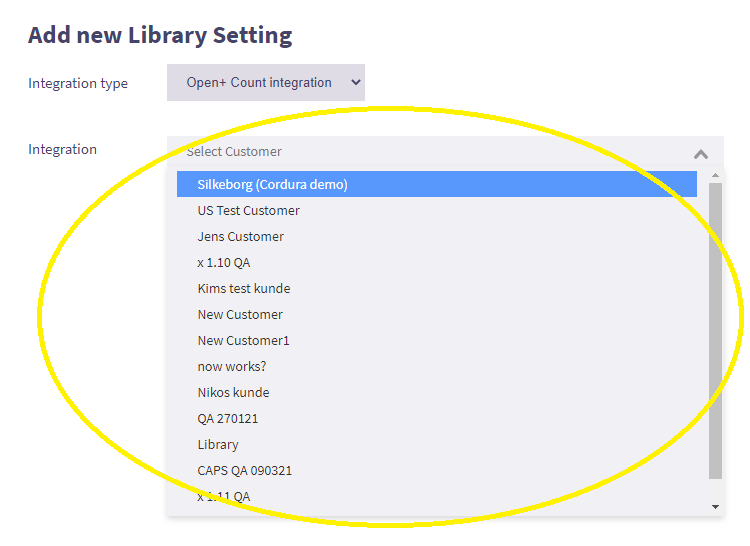
5. Select the correct customer from the “integration” dropdown, and click the Save button.
-
7.8
Optional: Integration with open+ Access
If the customer needs integration with open+ access, please reach out to 3rd level support.
-
7.9
Known issues
Known issues
On some older kiosk disk images there is a service installed called ‘BGInfoEventWatcher’ which can sometimes prevent the uniFi+ idle screensaver from showing.
This service should be disabled using the following steps:
- Open Task Manager
- Select the ‘Startup’ tab
- If there is an entry in the list called ‘BGInfoEventWatcher’ then select it and click ‘disable’
- Reboot the kiosk
-
7.10
cloudCheck tablet and uniFi+ idle (screensaver)
Requirements for setup:
- cloudCheck tablet running cloudCheck tablet software
- The customer being created in uniFi manager (formerly known as TLManager). See
Create new customer account
The screensaver will only launch from the start screen preventing interruption of any transaction flow. Clicking anywhere on the screensaver will return to the start screen.
-
7.10.1
Create idle screen for the cloudCheck tablet
For new customers:
After having created the customer in the uniFi manager, start by creating the uniFi+ idle screen to be used for the cloudCheck tablet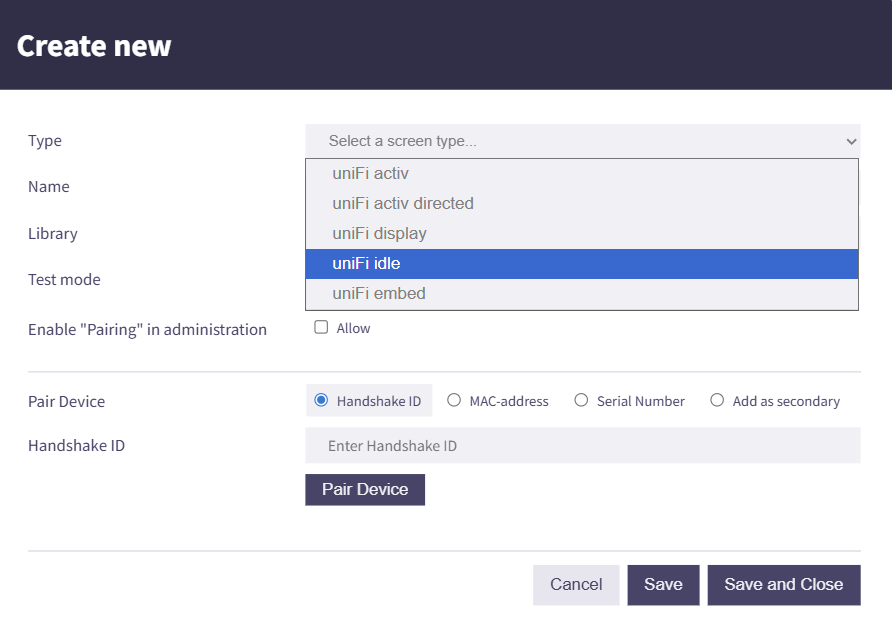
Give the screen a fitting name, e.g. "cloudCheck tablet screensaver" to easily identify the screen belonging to the library's cloudCheck tablet.
Existing customers might already have an idle screen they wish to use. -
7.10.2
Enable uniFi+ idle for the cloudCheck tablet device
Go to the cloudCheck configuration site and enable uniFi+ screensaver for the device:
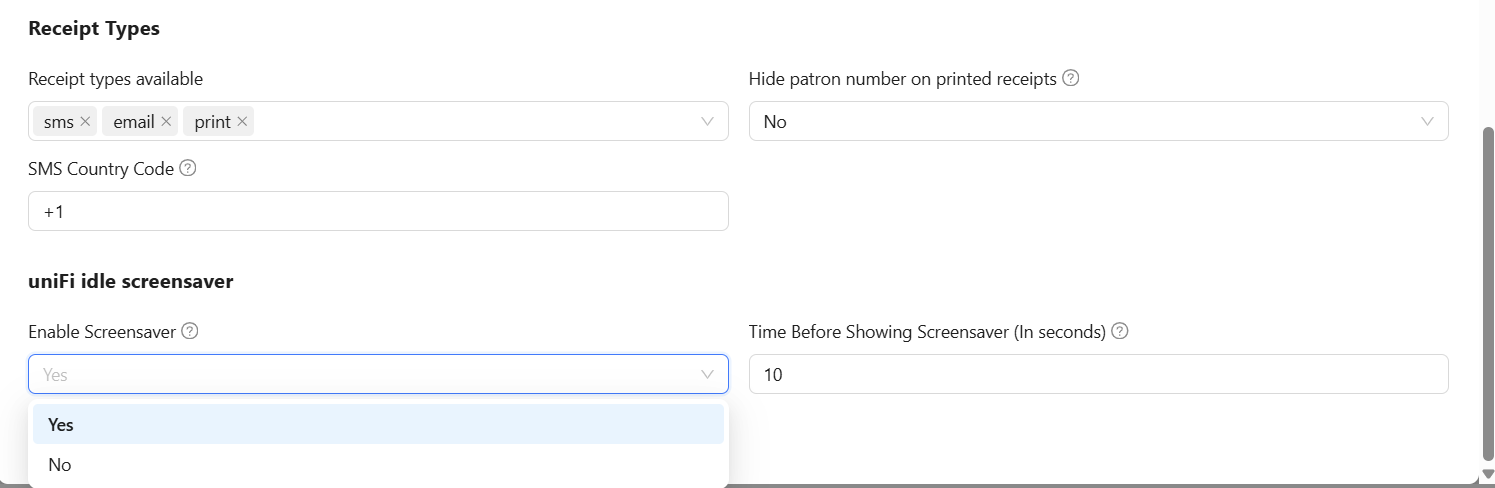
Also set the time in seconds, before the cloudCheck tablet will open the uniFi+ idle screensaver.
Afterwards click Save in the Device Settings form. -
7.10.3
Make the uniFi+ screensaver show on the cloudCheck tablet
After having enabled the uniFi+ idle screensaver on the cloudCheck configuration site, restart the cloudCheck tablet through EloView or click the "Restart app" button on the in-app service screen.
The service screen can be accessed by scanning a barcode with the value of 'PHXADMIN' and entering the service screen pin code.
The below link will generate the service screen barcode. The barcode can then be scanned by the cloudCheck tablet barcode reader on a mobile device.
https://barcode.tec-it.com/en/?data=PHXADMIN
After restart, the cloudCheck tablet will show the uniFi+ pairing screen: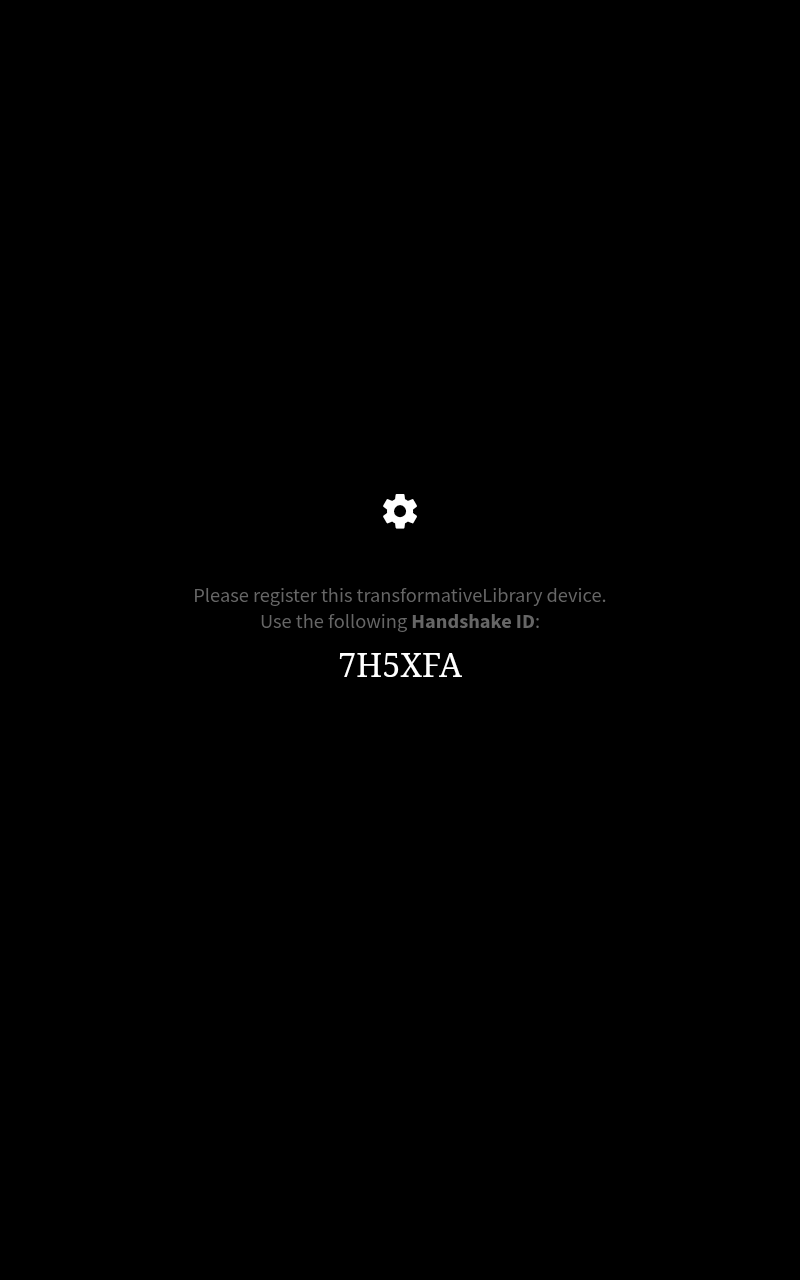
-
7.10.4
Enable daily restart for cloudCheck tablet
As the uniFi system relies on fetching updated 3rd party data such as Weather forecast data on restart, alike the NUC PC's, the cloudCheck tablet needs to have a nightly restart timer configured for the device in the eloview management portal.
Production tablets does not have a nightly restart scheduled by default.
To set a nightly restart for a tablet, go to https://secure.eloview.com/ and login with your user account.
In the device list, click on the tablet you're configuring with uniFi+ idle to open the settings menu and navigate to the 'Reboot Timer' tab: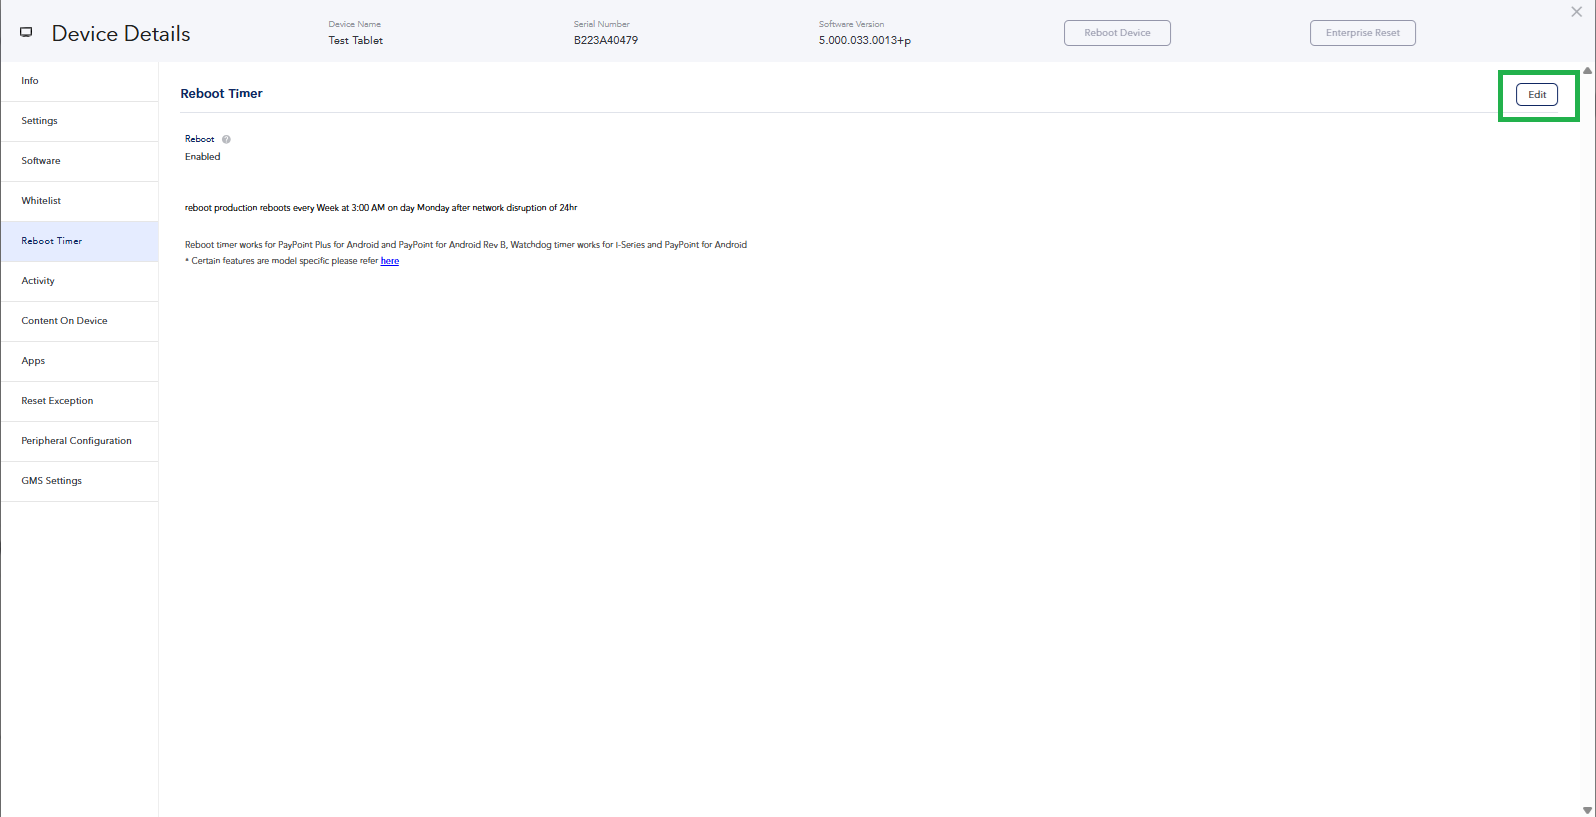
Click on edit in the top right corner, then on the edit icon: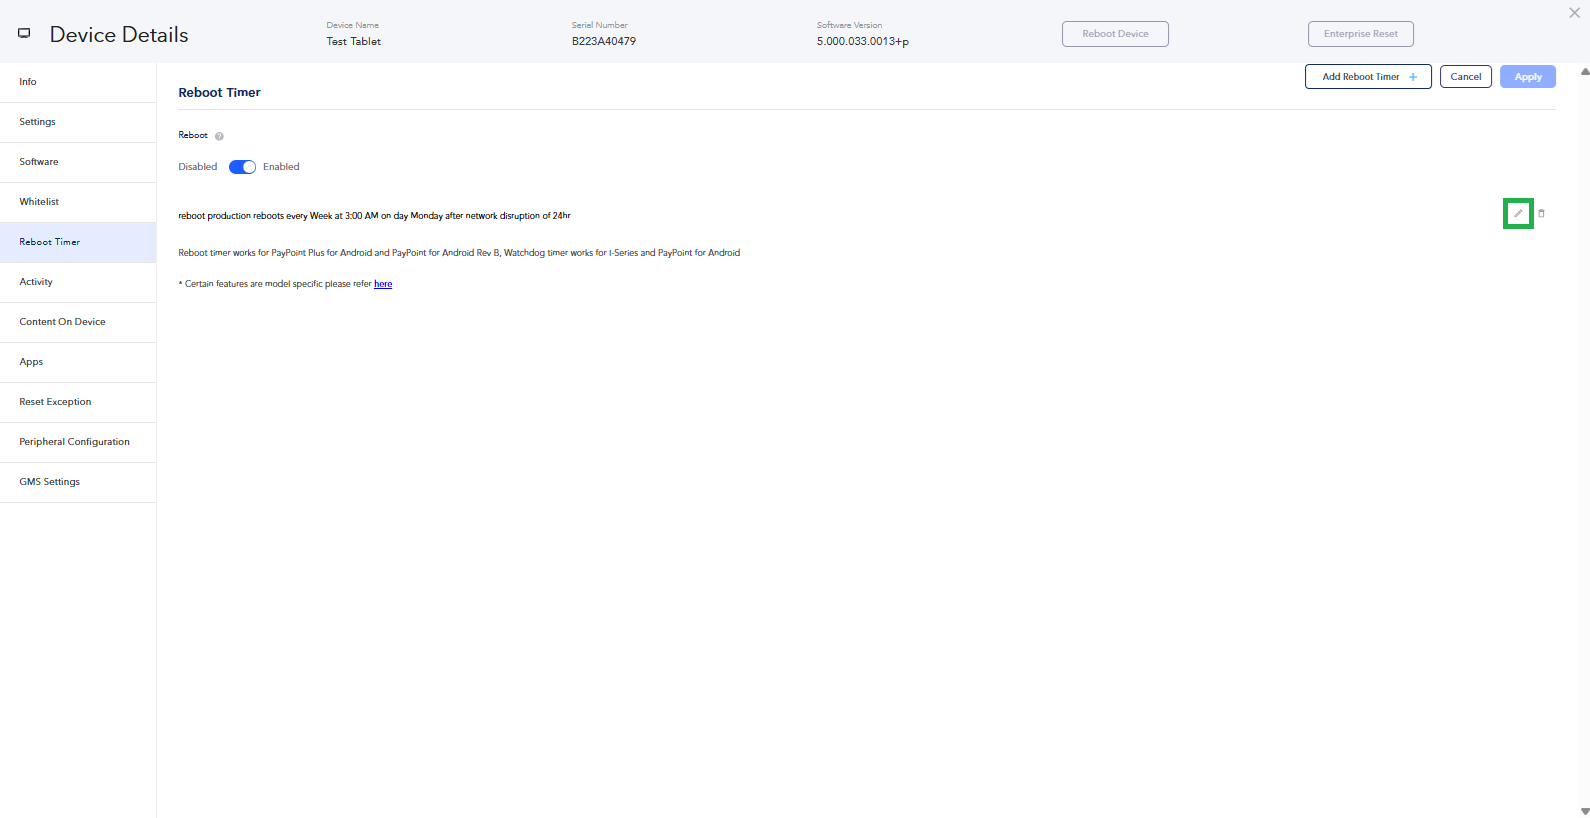
Which will open the 'Reboot Timer' setup dialog. Apply the below settings to enable a nightly restart for the tablet:
Afterwards click Save. The tablet will now restart each night at 03:00 AM to fetch new data for the screensaver content. -
7.10.5
Pair cloudCheck tablet screensaver to the uniFi+ idle
Insert the Handshake ID shown on the cloudCheck tablet for your uniFi+ idle in uniFi manager (alternatively through uniFi+ administration if enabled) and click ‘Pair Device’:
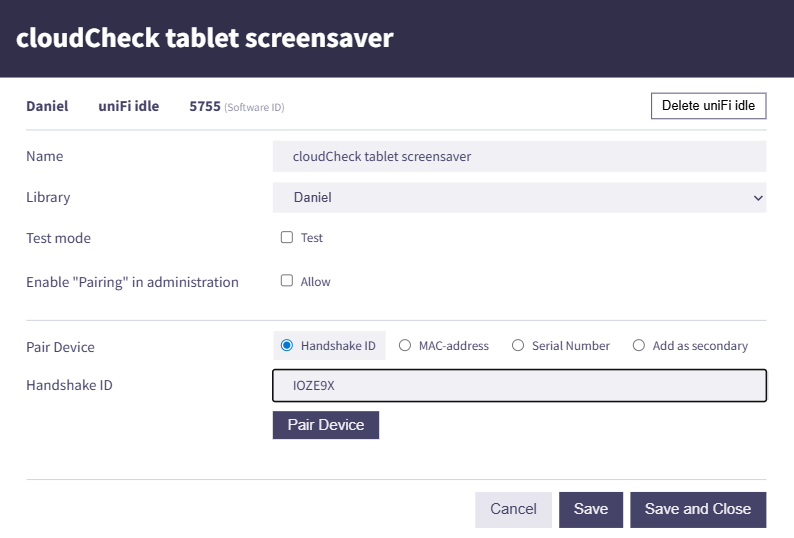
The cloudCheck tablet will now show the content attached to the uniFi+ idle screen as a screensaver: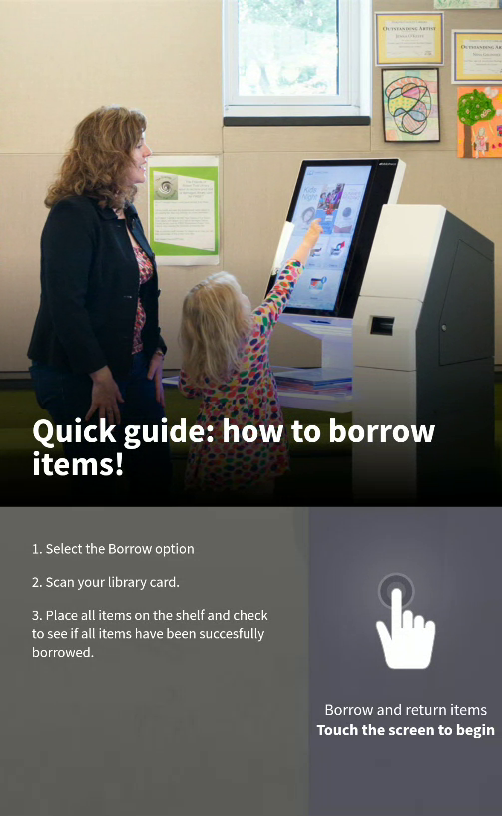
-
7.10.6
uniFi+ administration idle configurations
Introduction to the most basic uniFi+ idle settings, which will be sufficient for most customer cases.
The below information can be used in case the customer requires help in setting up their content for the uniFi+ idle.-
7.10.1
Changing text of touch advise
The standard text of the touch advice field is:
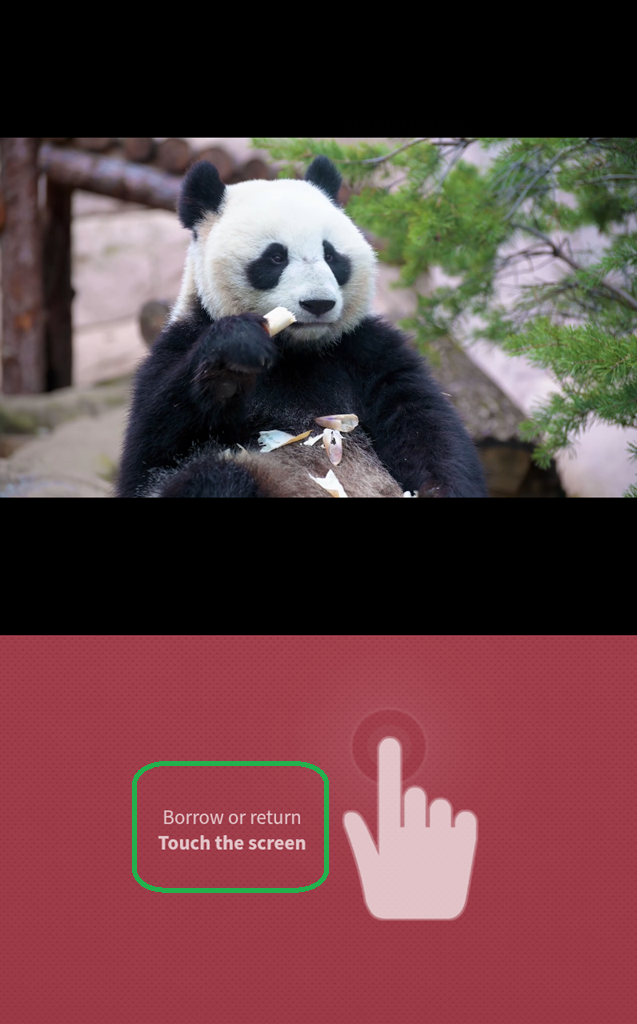
This can be changed in the uniFi administration on the Settings tab of the uniFi idle screen:
Which will show as: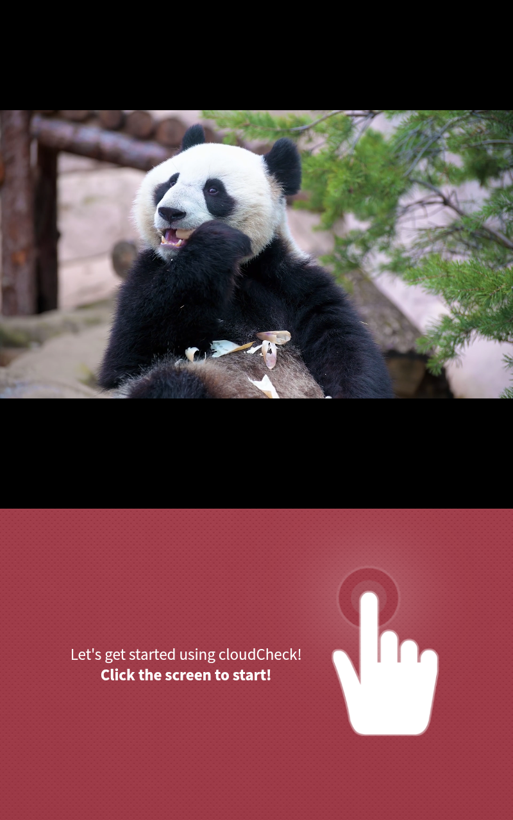
-
7.10.2
Style Theme settings (background color/image configurations)
The Style Theme attached to the idle screen can be used to configure the touch advice background color.
Start by choosing the Style Theme on the Styling tab of the uniFi idle screen: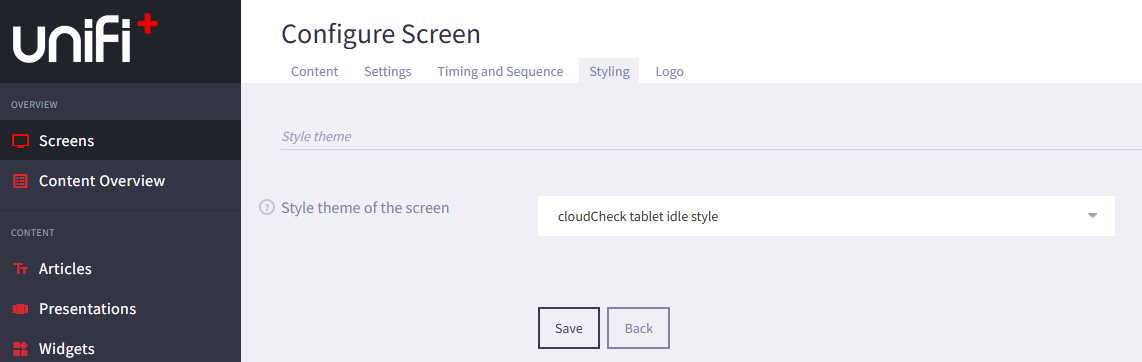
The Style Theme itself is edited under the ‘Style Themes’ tab: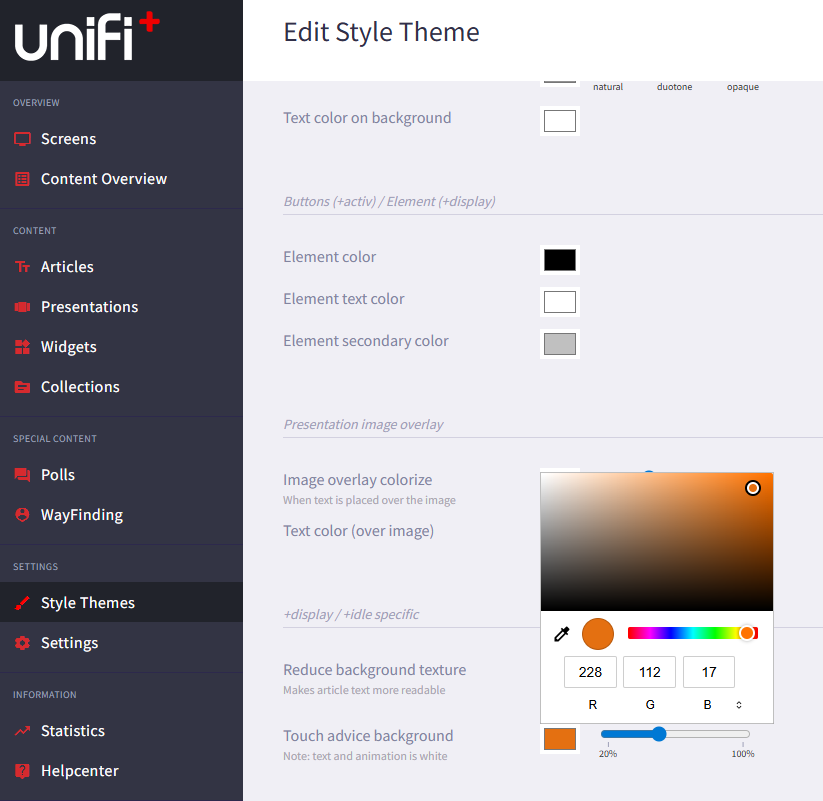
Changing the touch advice background color to grey, the idle screen will now show:
Instead of a color for the background of the touch advice, you can show a background image, with the background color as an overlay. Uploading a background image is done under the Background section: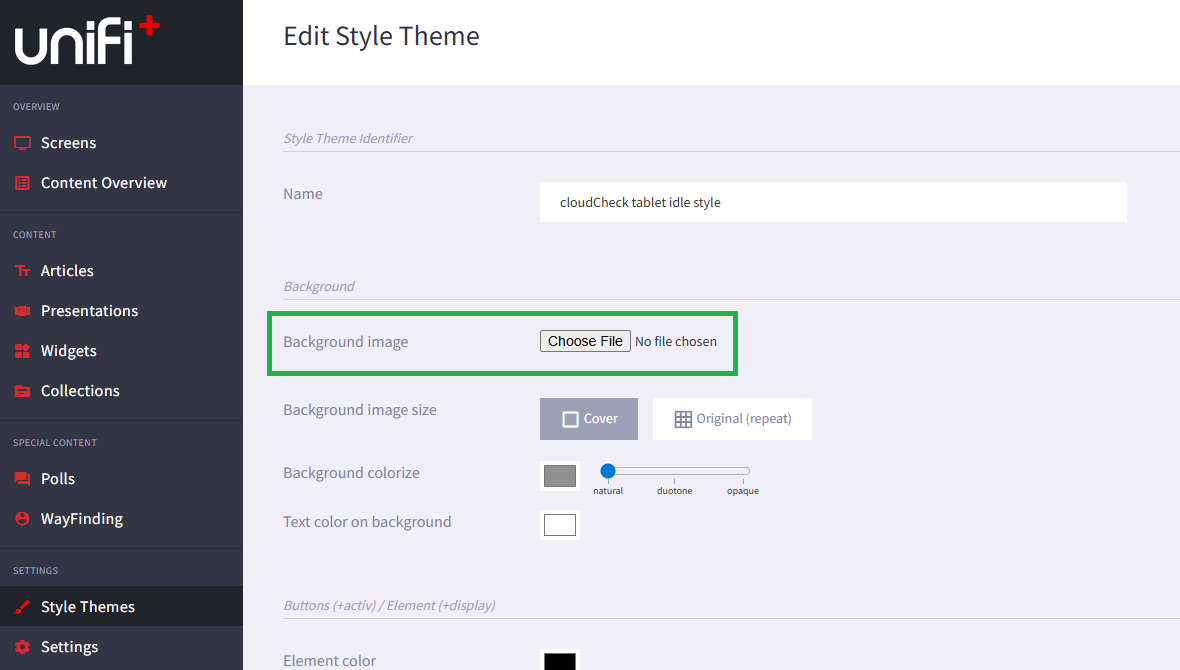
Adding this background image: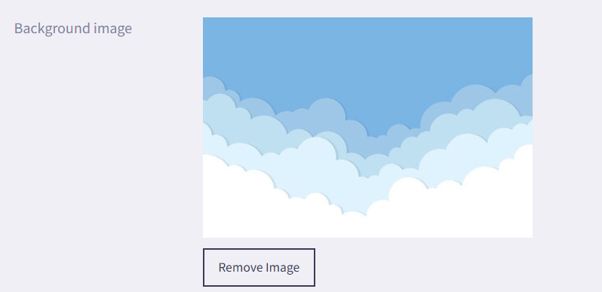
And having the background color green with the following setting:
Will produce the following output:

Further information regarding the customizations possible with 'Style Themes' are available in the Style Themes Section of the manual.
-
7.10.1
-
7.10.7
Adding / Updating content
After having added/removed/changed content for the screen, or altered screen settings, click the Update content button in the uniFi administration to push the new content to the device. The screen on the cloudCheck tablet will reload with the updated content.

-
7.10.8
Basic content types for cloudCheck tablet uniFi idle (screensaver)
Attaching a text article to the uniFi idle screen, it will show as:
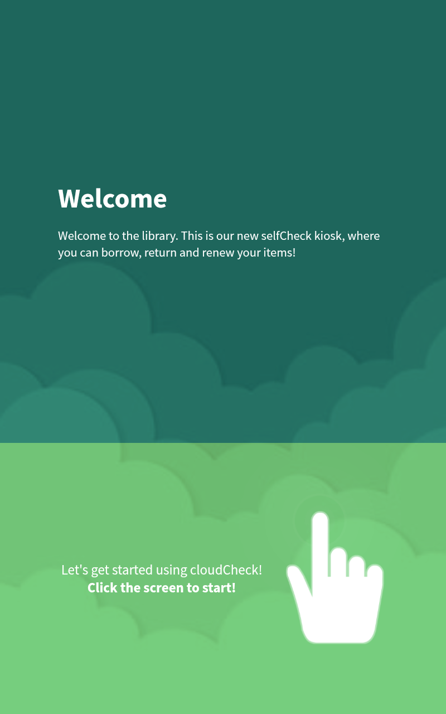
Attaching an image to the text article, it will show as:

Articles are the fundamental building blocks of presentations. If you add the above article to a presentation, you can edit the way the title of the article is displayed on the uniFi idle screen: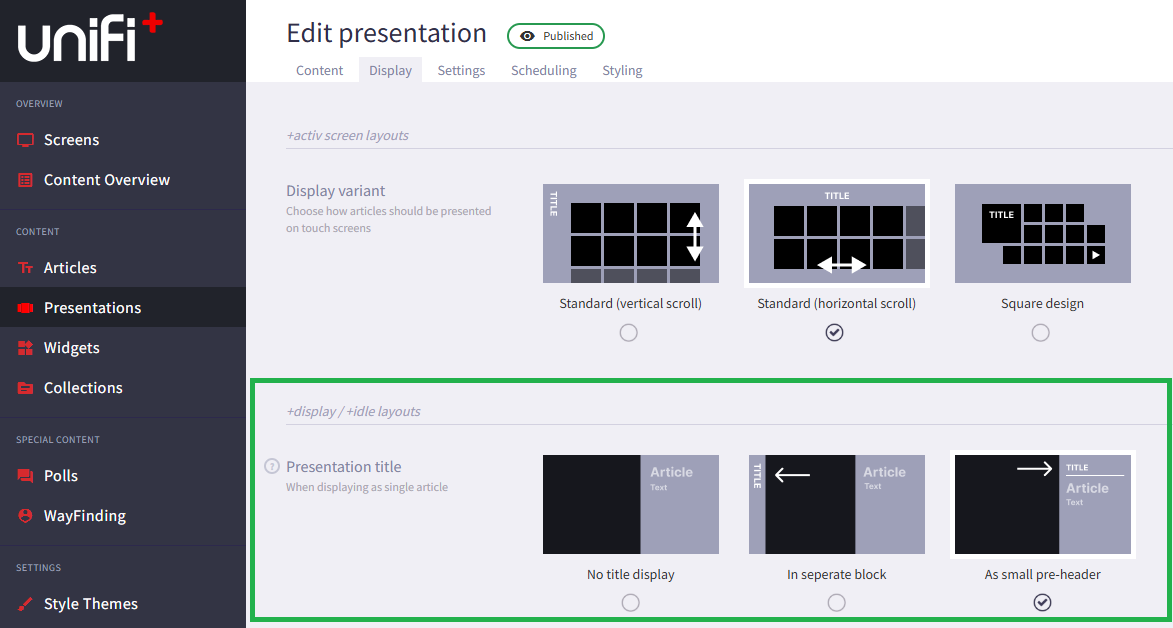
Showing the title of the presentation (‘Welcome to…’) ‘As small pre-header’ will give the following output:
Showing the title of the presentation (‘Welcome to…’) ‘In separate block’ will give the following output:
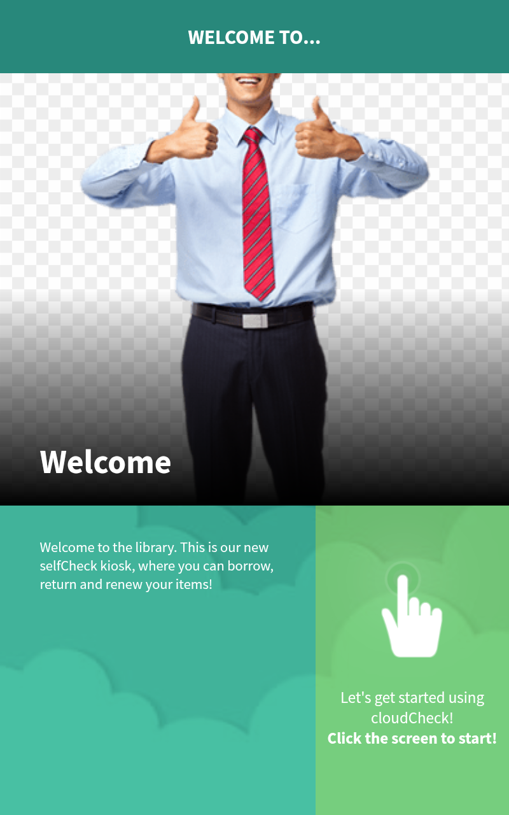
Showing the title of the presentation (‘Welcome to…’) with ‘No title display’ will give the same output as if it was just an article attached:

Wrapping the article in a presentation gives the additional possibility to override the standard Style Theme background image with the ‘Use custom image’ setting:
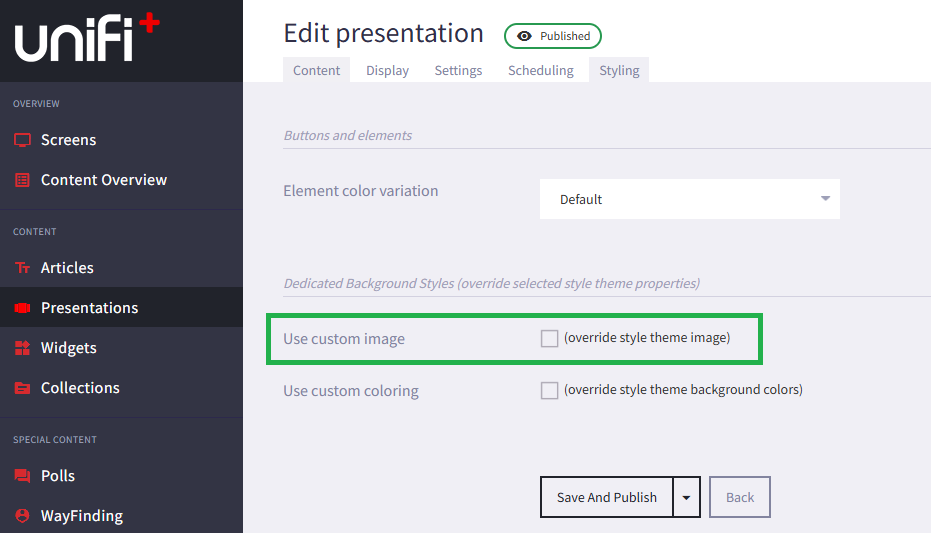
Setting this custom image for the presentation:
Will give the presentation a custom background image:
The presentation can also override the ‘Background Colorize’ Style Theme Setting atop the background image, and change color opacity for the touch advice and text field:
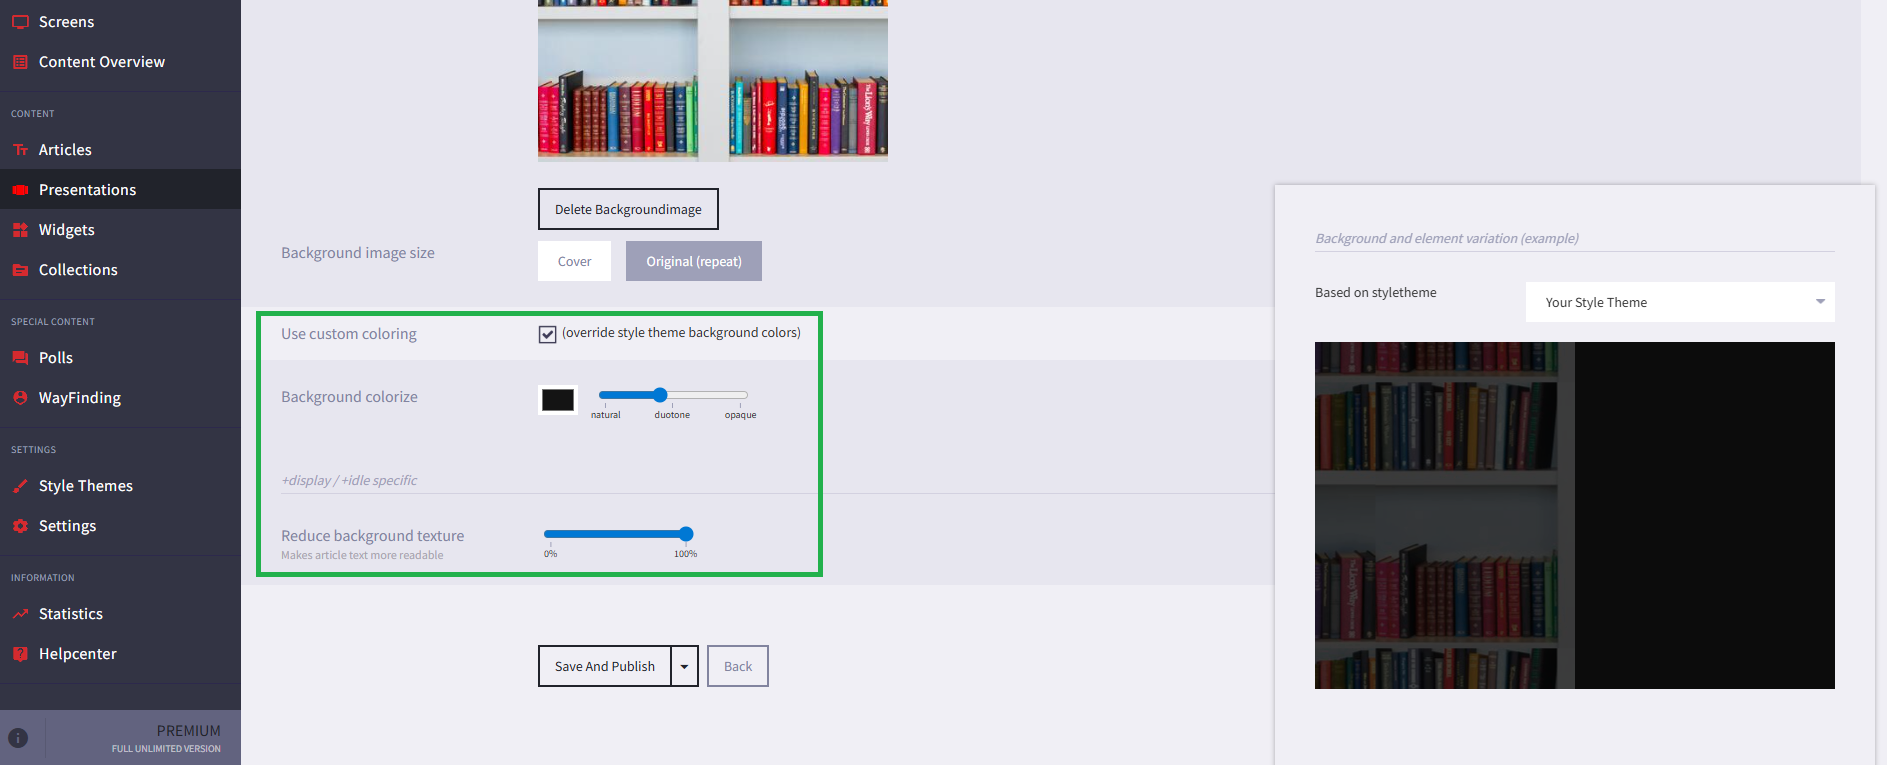
The above setting will give the following style, only for this specific presentation: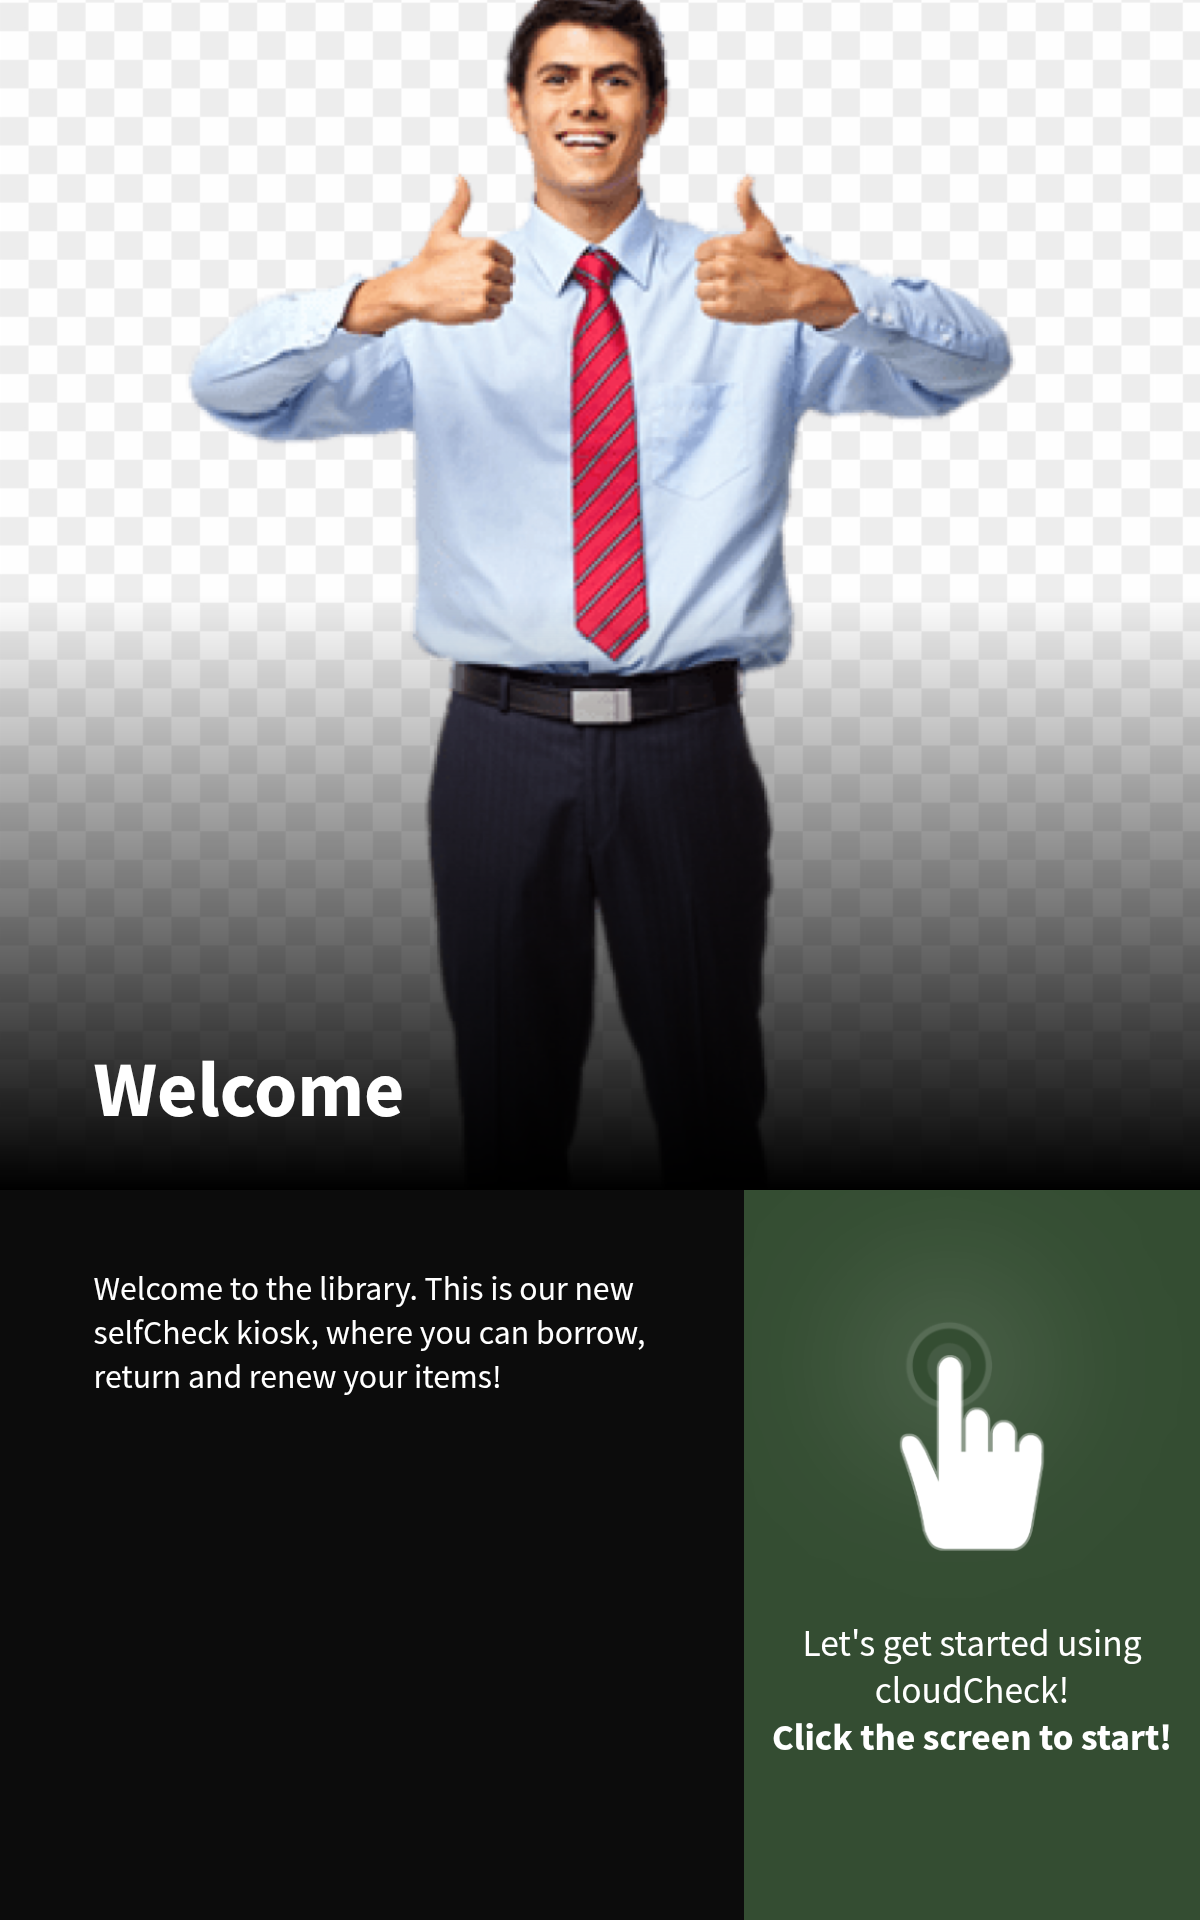
-
7.1

-
1729
-
Internal Manual

- 1. The System Overview
- 2. uniFi Manager introduction
- 3. Create a new screen
- 4. Pairing device with screen
- 5. Install software on device
- 6. uniFi Manager Tool Tips
-
7.
uniFi+ Installation guide
- 7.1 Before starting
- 7.2 Create a customer account
- 7.3 Create a new user
- 7.4 QuickConnect and screenSavers
- 7.5 quickConnect and uniFi+embeds
- 7.6 Test the screenSavers
- 7.7 Optional: Integration with open+ Count
- 7.8 Optional: Integration with open+ Access
- 7.9 Known issues
- 7.10 cloudCheck tablet and uniFi+ idle (screensaver)